SIX STEPS FOR A CUSTOM FIT FROM OUR HOBBIT-FOOTED GEAR EDITOR
I test several ski boots every winter. Since I have oddly shaped feet that never fit a boot out of the box, that means a lot of boot fitting. The good news is that these days most boots include a heat-mouldable liner.
The easiest way to dial in a custom fit is with the help of an experienced boot fitter at your favourite ski shop. That’s not always an option for me. Luckily, fitting a heat-mouldable liner is not rocket science. Here’s my six-step process to moulding boot liners for happy feet.
TRY THEM FIRST
Heat moldable liners expand and contract where needed, but only within a limited range. With a fat forefoot and a skinny ankle, I’ve learned some boots will never fit my feet without major surgery. To find out if I have a hope, I try the boots on. A snug fit is ideal and a tiny bit loose is okay. But if the boot feels sloppy or painfully tight, try a different size or a different model. No amount of heat moulding will help.
WHAT’S INSIDE COUNTS
When I’m fitting ski boots I wear my favourite ski socks and a good quality, ski-focused footbed. Most of the footbeds included in off-the-rack boots are little more than cardboard. I’ve found that a small investment in good footbeds boosts my comfort and skiing performance.
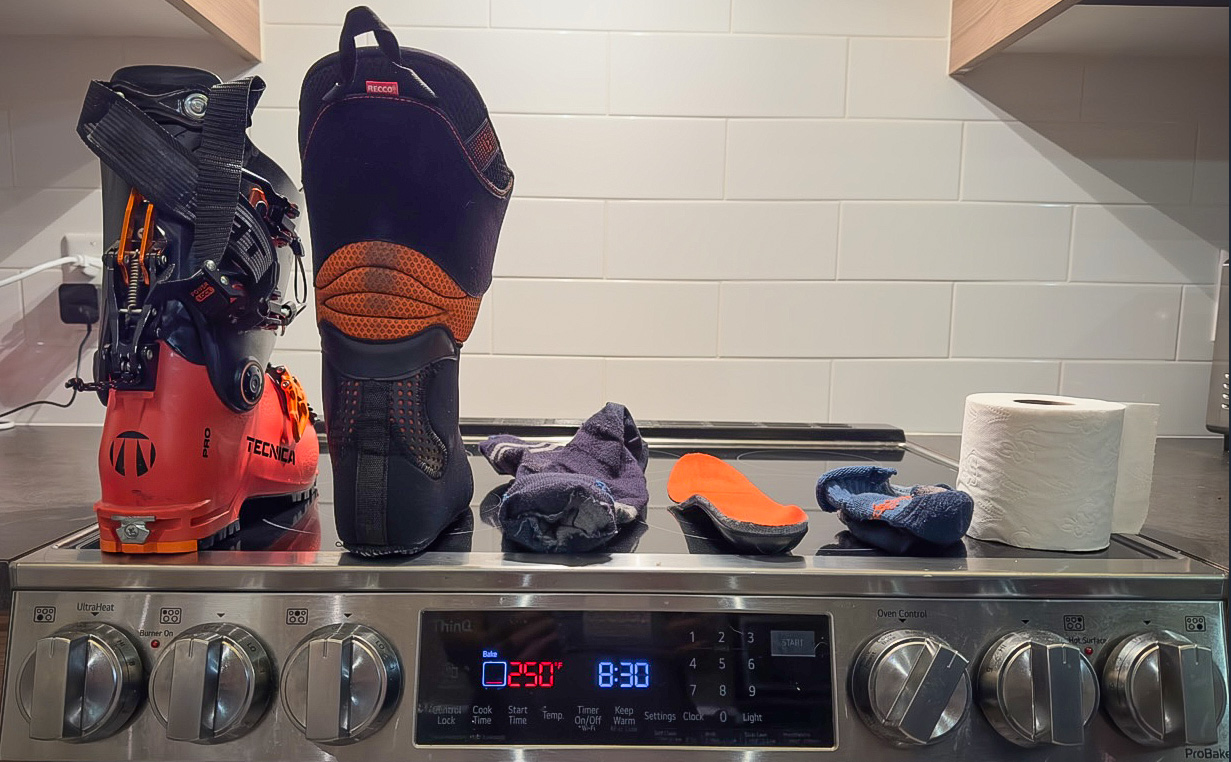
BRING THE HEAT
The instructions from Intuition, my favourite manufacturer, are to fill a sock with three pounds of rice, heat up the sock in the microwave and then slip it in the boot to heat the liner. They’re the experts, admittedly, but this feels like a waste of food (I’m not sure how clean your socks are) and it’s never worked that well for me. Instead, I go old-school and remove the liners from the shells and then warm them in an oven. I move the oven rack to its lowest position, set the thermometer to 250°F and pop the liners in for five to 10 minutes.
MAKE SOME SPACE
While the liners warm up, I prepare for the fitting. Intuition sells its after-market liners with a fit kit that includes toe caps. These create wiggle room around your piggies, a necessity for keeping feet warm. Don’t have a fit kit? Don’t worry, neither do I, so I make my own. I fold up toilet paper to create a spacer (about 5mm thick) that I tape to my socks. I make one to go across the end of my toes and another to go across the top. Once those are in place, I pull part of a thin sock over my foot (I’ve cut the toe off an old pair) to hold the toe spacers in place. Then I add more toilet paper spacers around any tight spots I noted when I first tried the boots on.
FIT THEM CAREFULLY
After five minutes in the oven I check the liners. They should look bloated and swollen. When they do, I remove one liner from the oven, slide in the footbed and carefully return the liner to the boot shell. They’ll be hot and floppy, so this takes some care (make sure the boot shell is pliable, not cold). And don’t rush: there’s lots of time before the liner sets. Once it’s in position, I put the boot on and pull up on the liner and tongue to make sure it is sitting properly. I carefully position the boot overlaps and then do up the boot incrementally. In spots where the unheated liner was tight, I do up the buckles a little tighter to create extra room. In loose-fitting zones, I leave the buckles a little loose to encourage the foam to fill in gaps. Standing on a hard floor surface, I lift my booted foot and bang the heel into the ground. This encourages my ankle to sink into the liner pocket for a locked-in fit. Then I repeat the whole process with the other boot. With both boots on, I assume a skiing stance and flex forward a few times. Then I wait. I stand fairly still for 10 minutes and then hang around in the boots for another five minutes or so.
TEST THEM OUT
I take the boots off and let them cool. When they’re at room temperature, I pull the liners out and make sure there are no funny folds or overlaps. If everything looks good, I take them for a test ski. They should feel fairly comfortable, but it may take a couple of days of skiing for them to feel perfect. If they don’t, you can always try again – you can heat them up a few times. After 10 years of fitting my own boots, I promise I’ve gotten better at it with practice.